So we have still not been able to fully repair the nozzle on the Ditto+. It seems to have been clogged by some hardened filament. This happened unexpectedly when we tried to change the filament in the printer. While we doing this routine task, some of the plastic in the nozzle got left behind unknown to us. When we tried to put the new roll of filament in, we found that it wouldn’t go into the nozzle all the way. After taking disassembling the entire nozzle mount and looking down the nozzle to see if the it was clear, we discovered to our dismay that it was not. We tried to clear it by melting out the hardened plastic inside the nozzle with a blow torch.
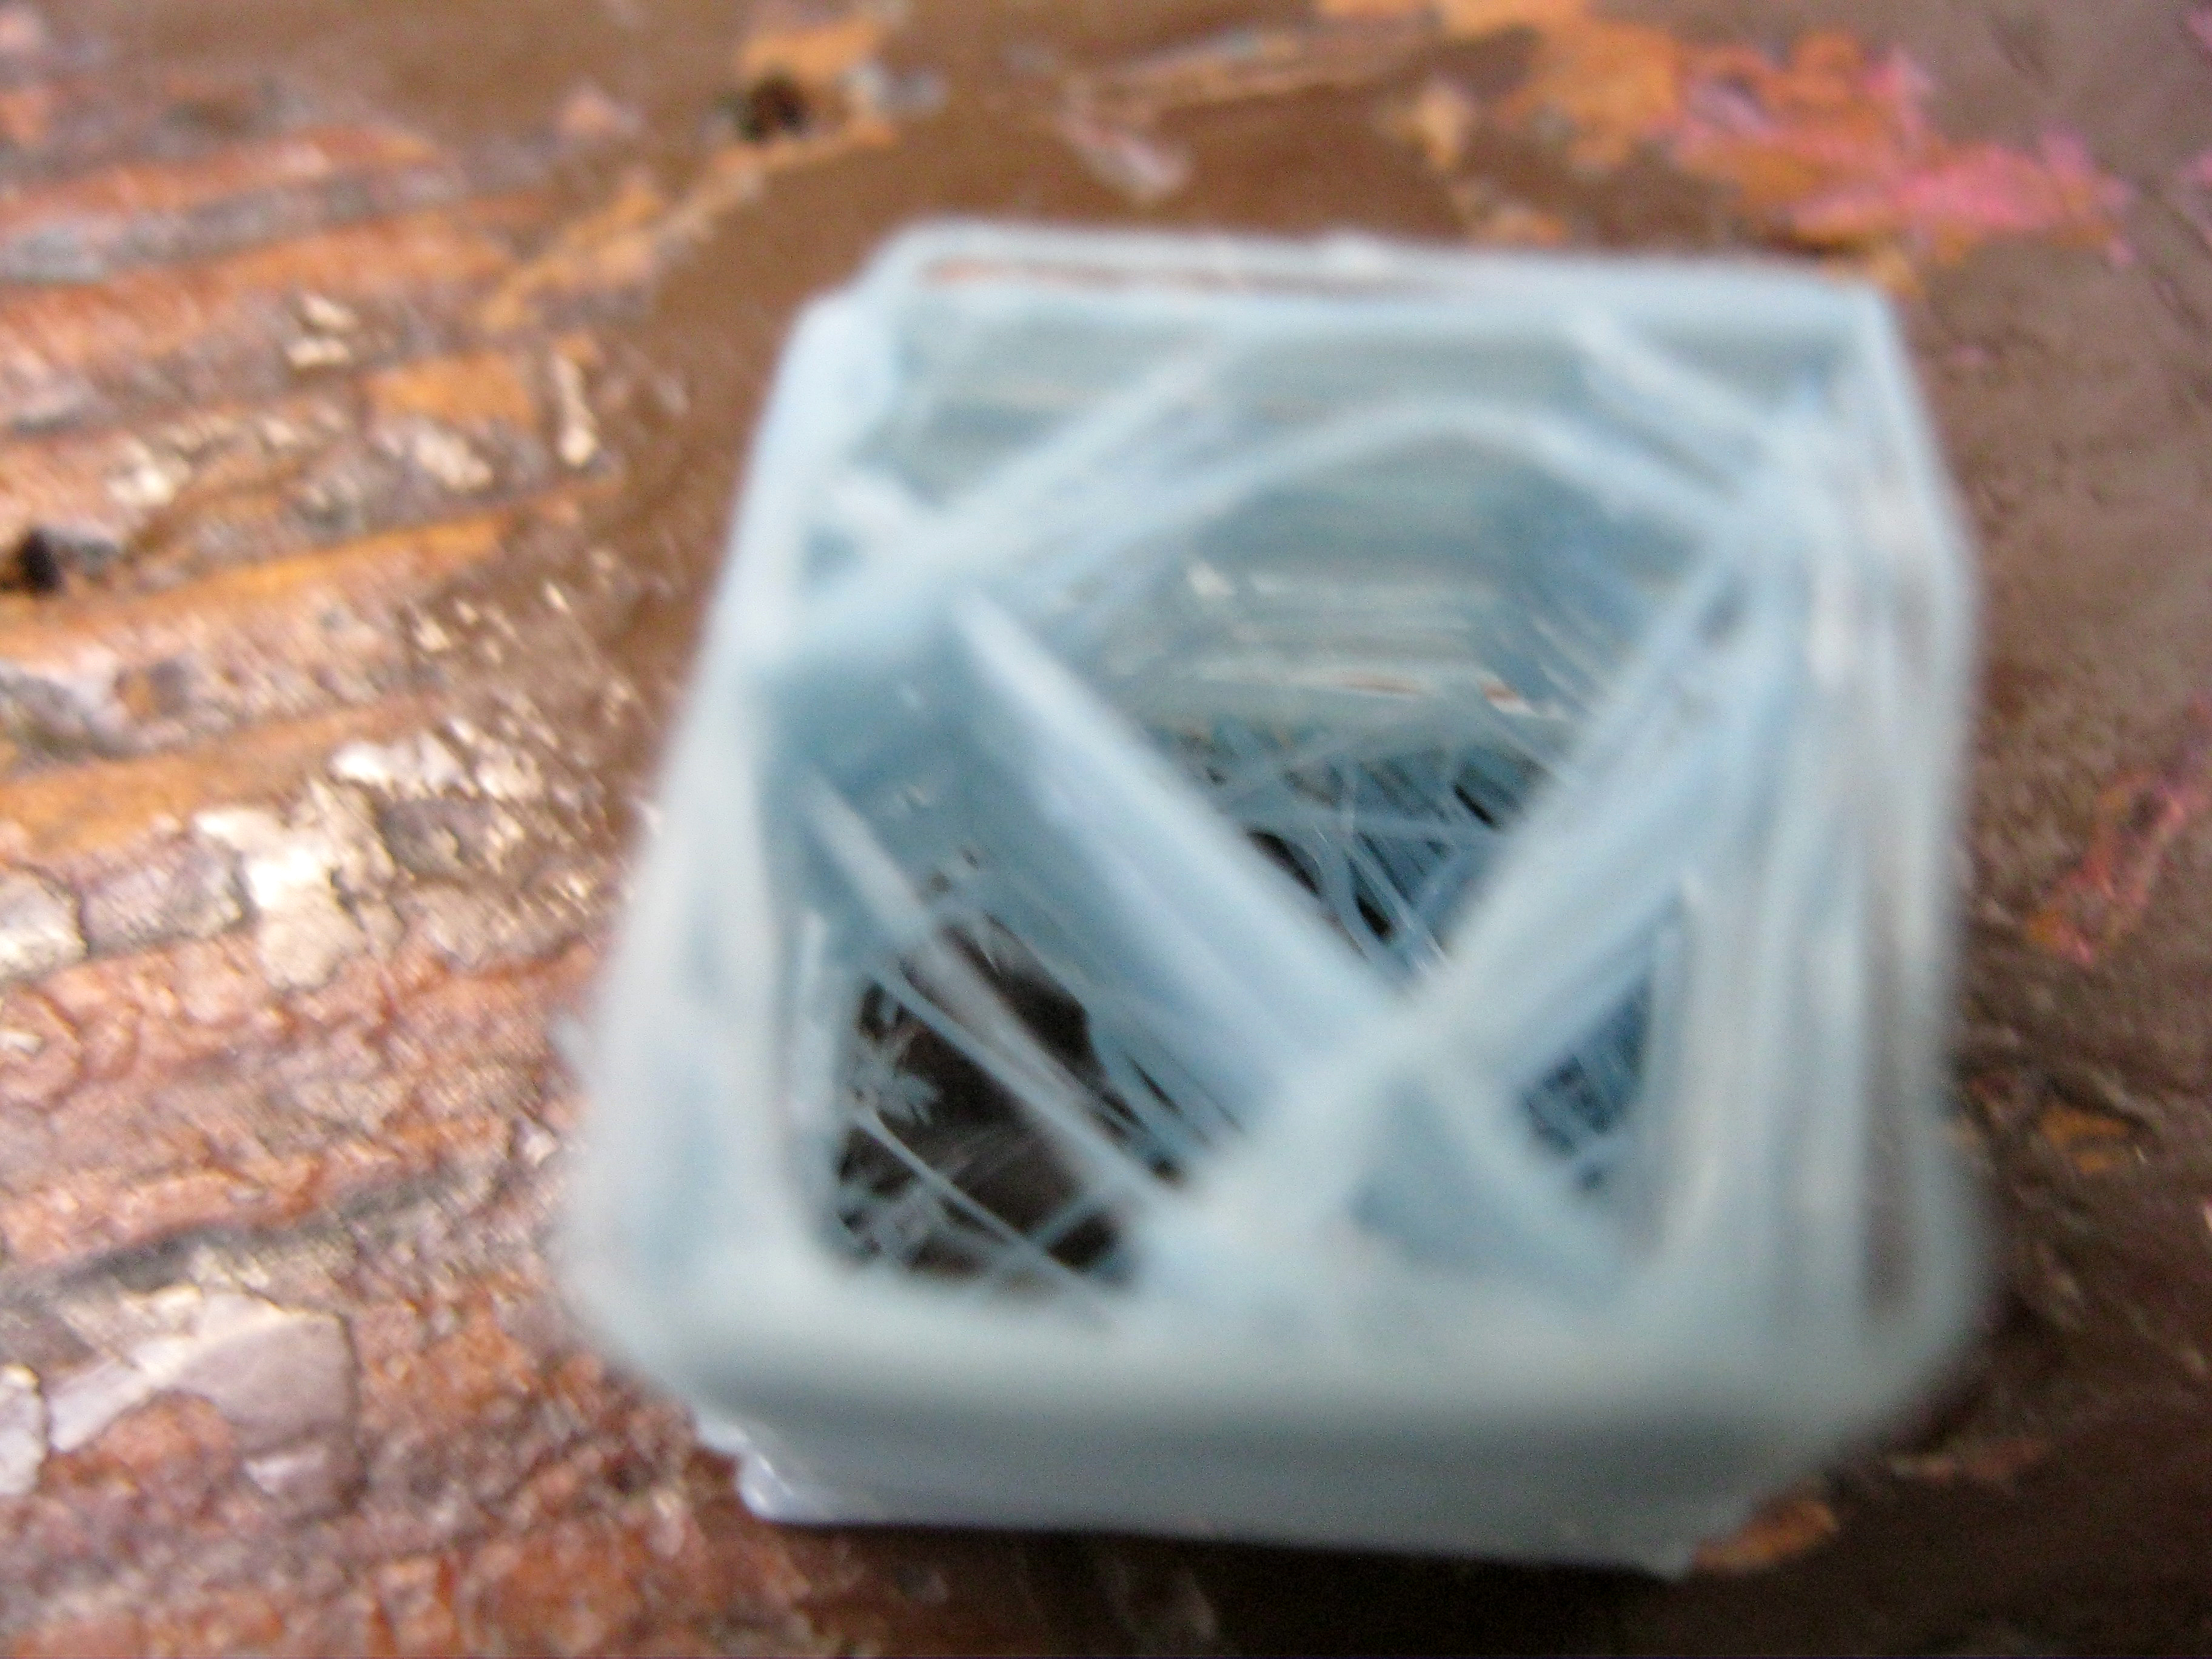
You can see in this picture that the wafering of the cube is pretty bad.
The other day we finally got the time to print test the nozzle after attempting to clear it and here are some pictures of the results. The pictures below are of the 10cm cubed cube that we printed. It seems that the printer wasn’t printing at a constant extrusion rate, or the print bed was to high which could be the reason for the wafering effect.
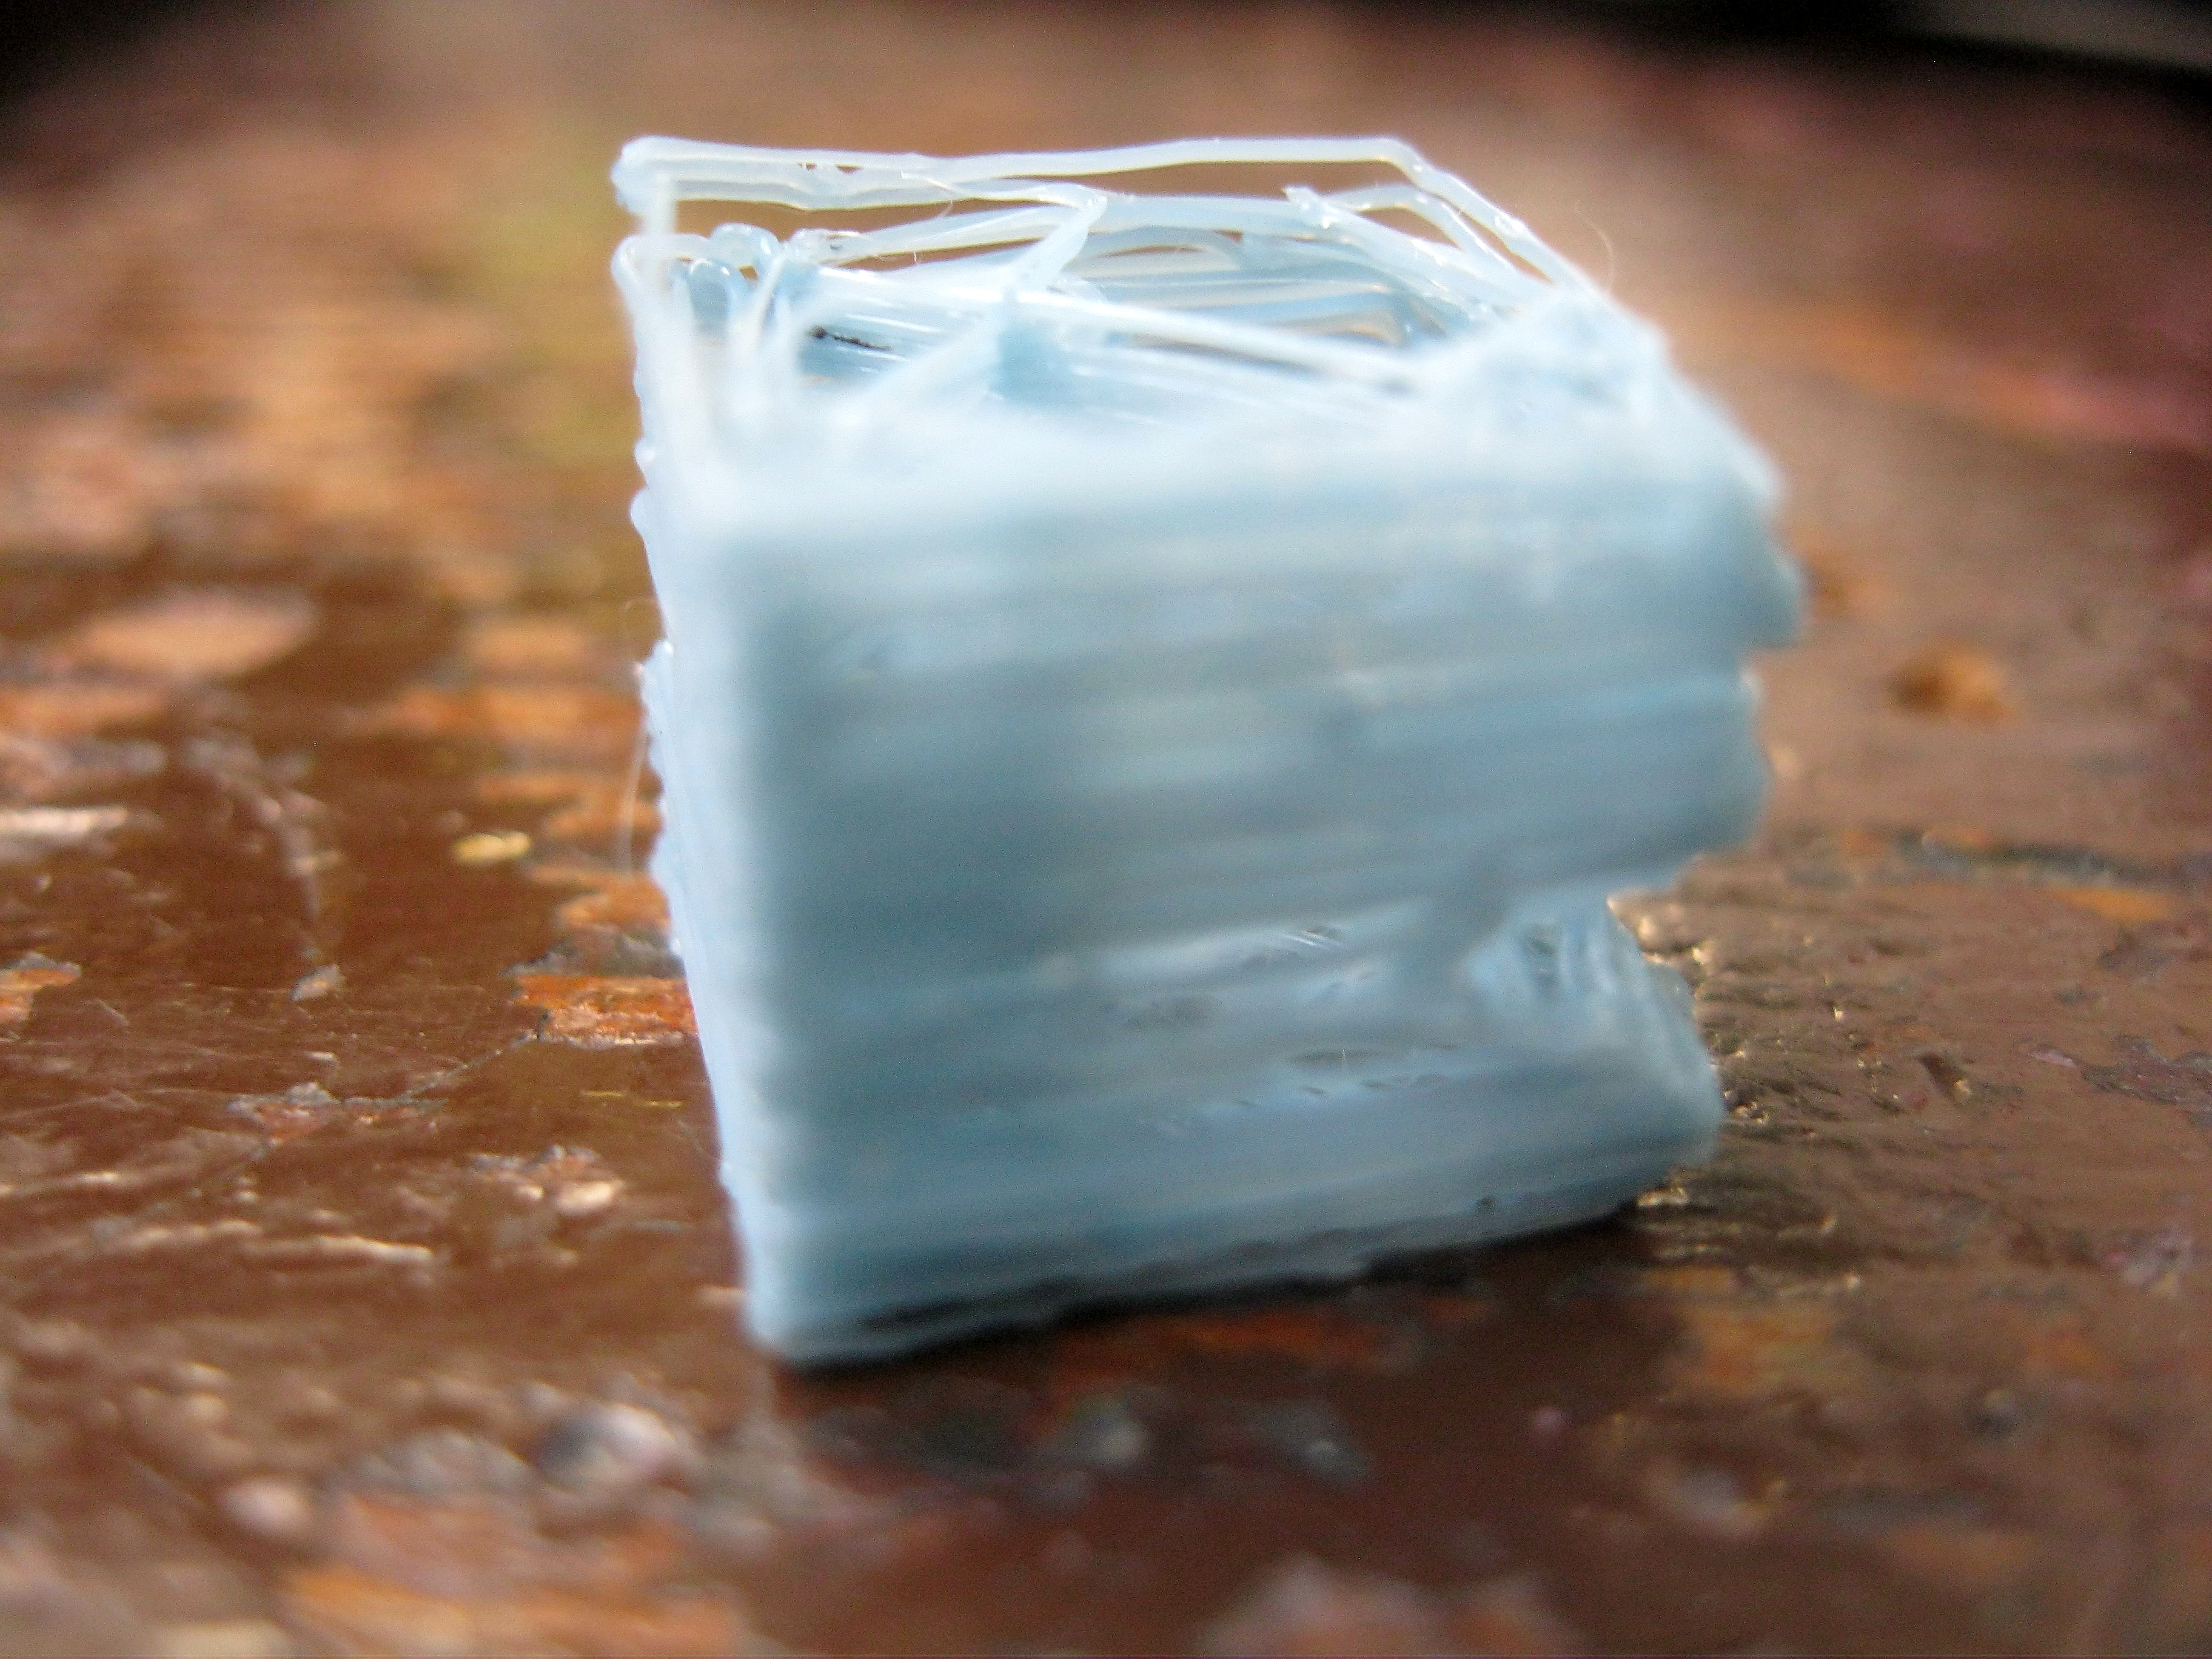
An uncanny resemblance to a wafer cookie.
Since we this test was just after we cleared the nozzle, we believe that it is the former and has something to do with a variable extrusion rate from the nozzle. The reason for this variable extrusion rate could be that one of the pieces inside the nozzle that is supposed to be smooth, was damaged somehow and is no longer smooth. We plan to try to melt any extra plastic out again using the blowtorch technique, to see it there is any unwanted filament still in there just to be sure.
Since we aren’t too optimistic that blow torching it again will fix the problem, we have ordered a new nozzle for the printer. The new extruder that we ordered is somewhat smaller than the one we currently have so some adjustments need to be made to the nozzle mount.