Clearing The Nozzle

If your nozzle gets clogged or jammed you will need to clear it. To do this you should first take it off the mount.

IMG_1996


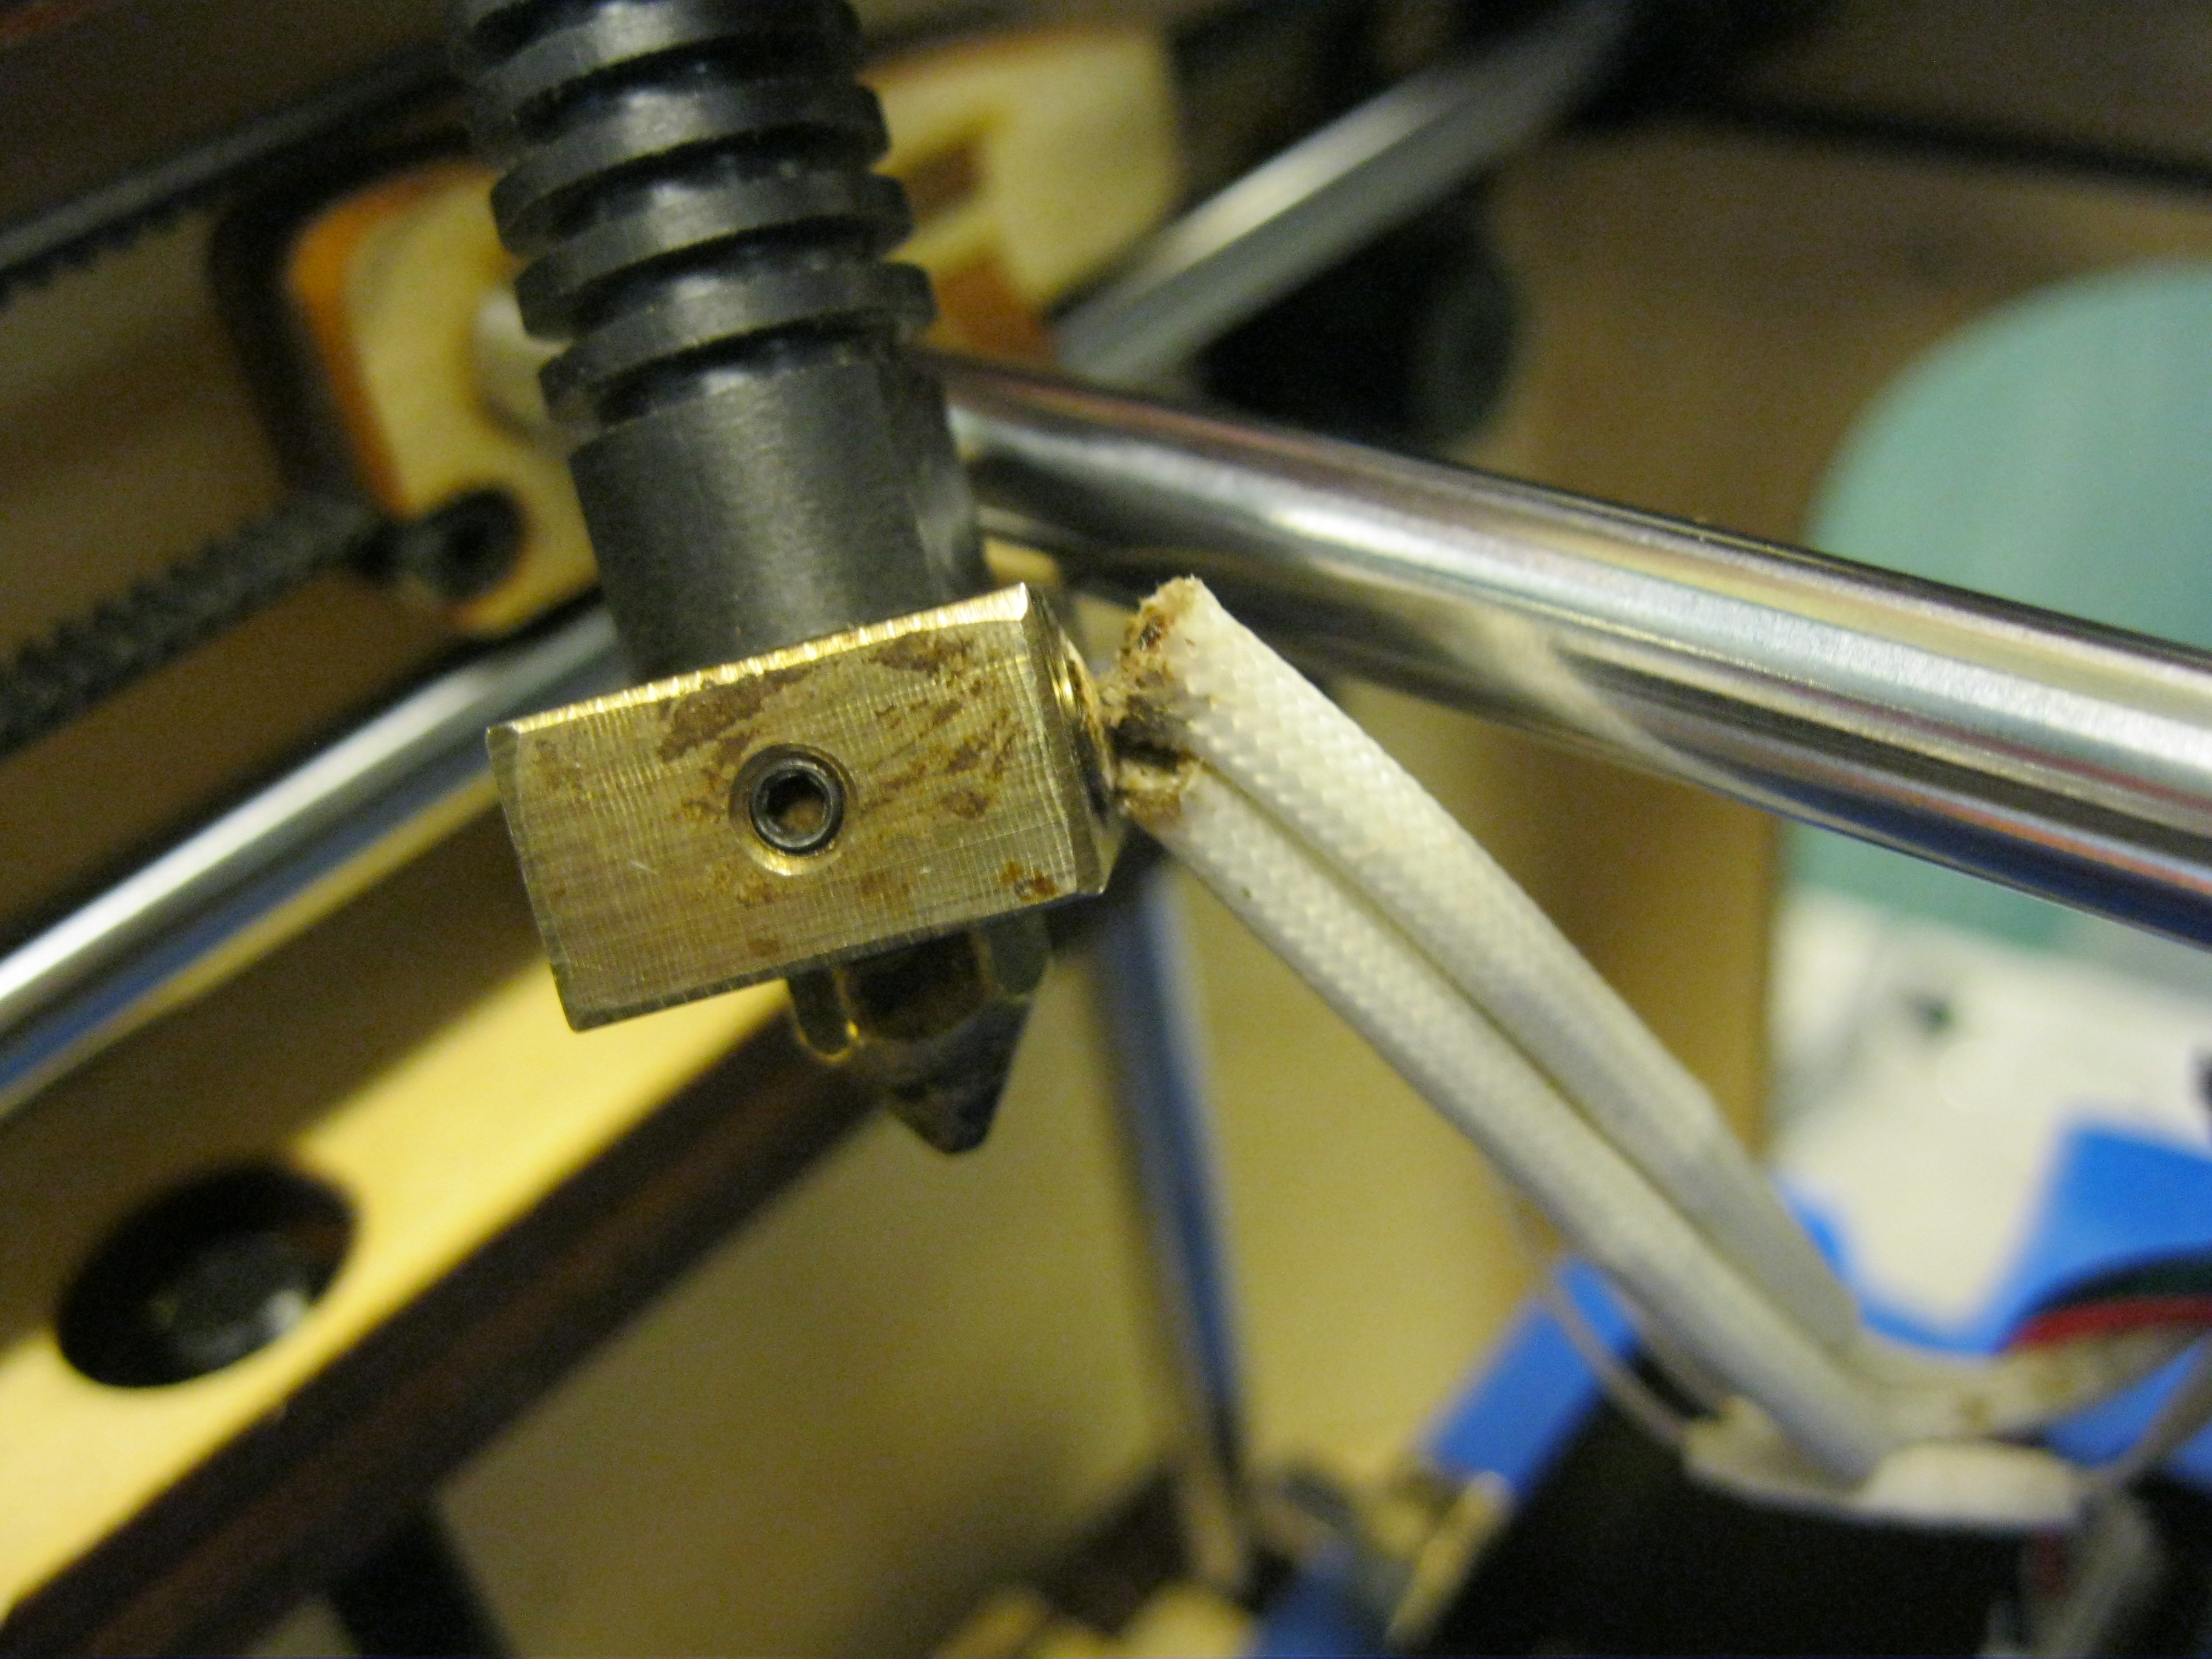
To take off the thermistor and the heat cartridge find the screw the the metal block. Then unscrew the screw and remove the heat cartridge. Do the same for the thermistor.


IMG_2001

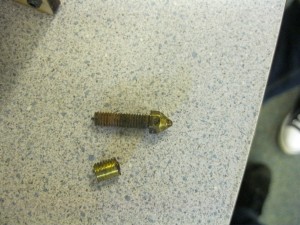
Then unscrew the nozzle and the metal part. For the nozzle you will need a wrench and for the nozzle you will need a flat head screwdriver. After you do this look through the nozzle to see if it is clear. If its not then get a blow torch and go somewhere were you can use it. Then heat it up and melt the plastic that is stuck in there out. You may also want to check the smaller metal piece to check if its clogged.


IMG_2004This piece may also be clogged. This is the piece that is on the inside of the black plastic cylinder. If so then use some tip cleaners or something with a similar shape. Then push the plastic that is stuck in there through.


Then done. Put it all back together and make sure that you don’t crush the thermistor when you put it back in.


Tiny Home Design

For Science and Tech we had the task of researching and designing a tiny home. A tiny home is a really small house, usually for one or two people to live in. The main benefits of a tiny home is the low price in comparison to a regular house, because they are smaller. They can vary in price depending on their size, but from what we have seen in our research they tend to be quite cheap.

Before we designed our tiny home, our group (the two of us) decided that we would print out our tiny home. In order to make this happen, we did the research on CADs (Computer Aided Design) and planned it out on paper. We then went on to populate it with furniture and estimate the costs. First we designed the general structure of our building, then put in the furniture (which looks like a bunch of rectangular prisms).  We made sure that when we designed it digitally, we used a CAD that we knew we would save in a file type that would be compatible with our slicer.

The CAD we decided to use was FreeCAD, because it was free and open source, but mainly because it was free.  Since we aren’t exactly CAD experts our design was pretty basic.  As you can see in the picture below (If you use your imagination you might be able to see the fridge and some cabinets).

DSCF3727DSCF3712

After a few hours of work between each of us, we finished our design. Once that was taken care of we saved it as a mesh file so that we could slice it. After slicing our design and scaling it down to a reasonable size so that it would fit on the print bed, we ended up printing it in PLA on the Ditto+. It took somewhere between 30mintues to an hour to print and turned out pretty well.

After inspecting the print, I was surprised to see how well the arch above the doorway worked out. Neither of us had even thought about the possibility of it being a problem until we saw that it had worked. That’s a quick summary of our process for our tiny home design.

3D Printer Nozzle Problem

A few days ago while we were changing the filament on one of the printer at for an open house, we realized that the nozzle was clogged with filament that had broken inside the nozzle. Upon realizing this, we tried a simple nozzle clearing technique.

This technique requires binging the printer to temperature so that the filament inside the nozzle would melt. When the printer gets to temperature, you use some filament to push the rest remaining filament out of the nozzle clearing the path for the new filament. The entire process should be repeated a few times to ensure that the nozzle is clear.

To our dismay, this did not work. The filament inside the nozzle did not even budge. Since it didn’t work the first time, we tried a second time except with some tip cleaning tools, which still did nothing. So at this point we are unsure what to do, we plan on getting a new nozzle because that is all we can think of.